

Working on the canvas
The palette, wiring nodes, editing parameters, layout, and keyboard shortcuts.
Adding nodes
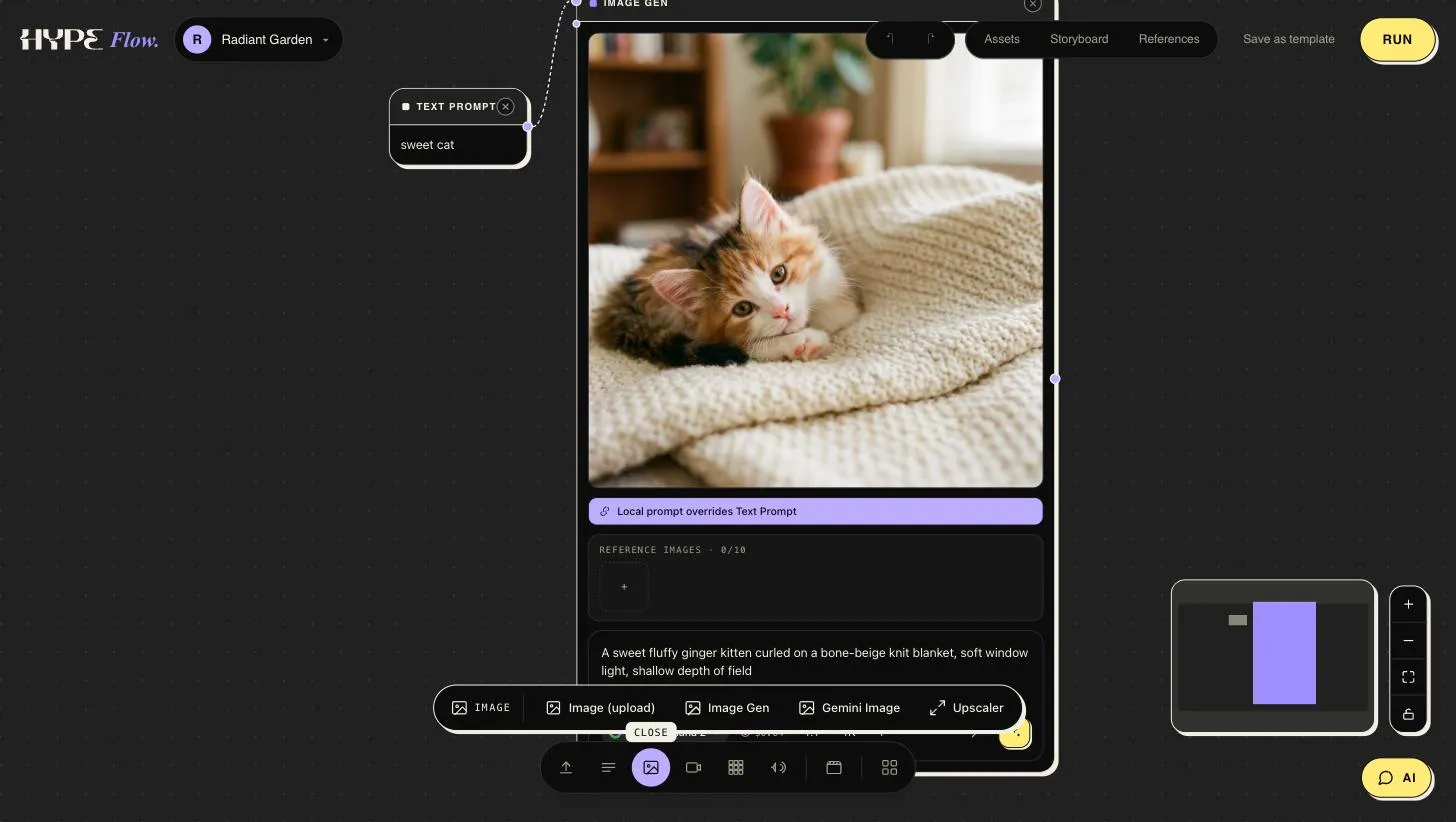
Section titled “Adding nodes”Open the palette — the toolbar at the bottom of the canvas — and pick a node. Each icon fans out into its family: the image icon offers Image upload, Image Gen, Gemini Image, and Upscaler; the video, audio, and template icons do the same for theirs. Drop nodes anywhere; position is free-form and saved with the project.
You can also skip the palette for media. Drop image, video or audio files anywhere on the canvas and each one lands as an input node where you dropped it (three per row, spaced so they never overlap). Paste works the same way: copy an image, a video or an audio file and press ⌘V — Hype Flow creates the matching input node with your media attached. Upload files… in the canvas options menu (and in the right-click menu) opens the file picker on the same path, and a card dragged from the Library onto a canvas is placed under the cursor. A small strip shows each file’s progress; Cancel stops the rest of a batch (files already uploaded stay in the Library), and ⌘Z — or the strip’s Undo — removes the whole batch of nodes at once.
Social links work too. Copy the link of an Instagram reel or video post, a TikTok, a post on X or a Snapchat Spotlight and paste it onto the canvas (⌘V): Hype Flow fetches the post’s video and it lands as a video node, ready for Video Analyzer or Ad Recast. Import social… in the canvas options and right-click menus, and the Import social entry under Video in the Add menu, do the same from a dialog; every Upload card takes a link as well. A carousel gives its first video; clips are capped at 10 minutes and 200 MB; YouTube isn’t supported yet. The asset keeps the post link, author and music credit, and shows under Imported from social in the Library.
Any configured node can be copied. Select it — or several — and press ⌘D to duplicate in place, or ⌘C then ⌘V to paste copies at the centre of your view; the ⧉ button in the top bar does the same for the current selection. Copies keep the model, parameters, prompt and references, and the wires between copied nodes, but start without outputs, so Generate produces fresh results.
Wiring
Section titled “Wiring”Drag from an output port to an input port. Ports are typed — text,
image, video, audio — and only compatible ports connect. One output can
feed many inputs; generation nodes with multiple reference slots
(image_1 … image_10) take one connection per slot.
Delete an edge by selecting it and pressing delete. Rewiring an input replaces what was there.
Parameters
Section titled “Parameters”Every node card exposes its parameters inline: model dropdowns, prompts, aspect ratios, durations, voice settings. Two things to know:
- Parameters follow the model. Each model advertises what it supports; controls that a model ignores aren’t shown, so every visible knob does something.
- Long prompts collapse. Prompt fields fold down to a preview once they grow; expand them to edit. Handy when an LLM node has written you a 400-word cinematic prompt.
Layout
Section titled “Layout”- Tidy layout (canvas options menu, the ⋯ next to Generate) re-lays the graph left-to-right by data flow using each card’s real size, so nothing overlaps and every wire is kept. It is one undo step — ⌘Z puts everything back. Use it after the chat companion has added a batch of nodes, or whenever wiring gets spaghetti-ish.
- Pan with drag / scroll, zoom with pinch or ⌘+scroll.
Appearance
Section titled “Appearance”Hype Flow has light and dark themes (Bone Beige / Ink Black) — switch in settings. Your choice is saved to your account.